Stone Medallions Installation Instructions
Tools and Materials Required:
- Chalk-line or marker, ruler
- Marble Set or Thinset Adhesive
- 1/4 to 3/8 inch square notched trowel
- Wet saw or side grinder with a diamond blade
- Sponge, dry cloth
Estimated work time:
3 hours
Surface Preparation:
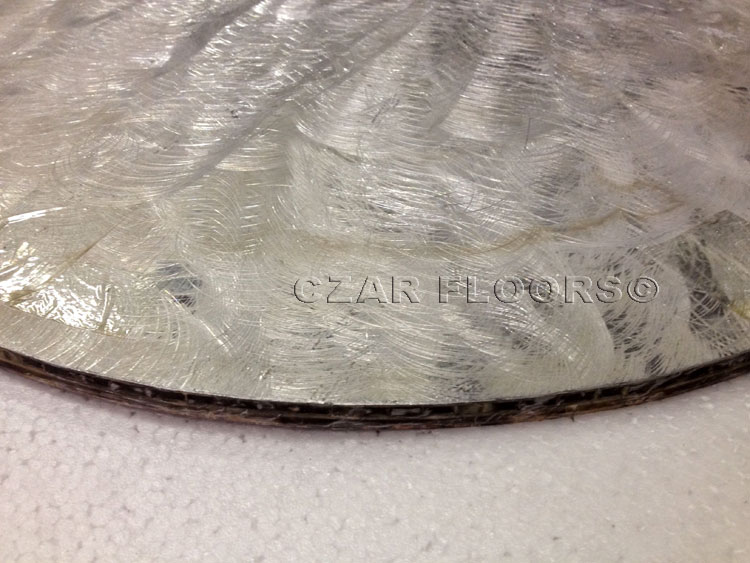
The subfloor or wall must be structurally sound, rigid, smooth, flat, and free of curing compounds and waxy or oily films. Depending on your existing subfloor or wall, you may need to install a backer board before installing your medallion. The medallion's back is made with aluminum, roughly pre-sanded at the factory to ensure good adhesion. Ensure the backer is clean. Remove protective rubber edger from the medallion. You can remove the transparent protective film on top of the medallion after installation.
Outdoor and Solid Marble Installation Considerations:
For outdoor installation, we recommend using solid marble medallions 16-19mm thick. Please choose the 3/4" thickness option when ordering on-line.
The most crucial aspect of the outdoor installation is a proper foundation. The foundation pad must be cast-in-place using high-compression strength concrete at least 5" thick. Preferably use the metal net or rebar reinforcement to prevent cracking. Make sure the concrete pad is flat and even. The cracked or uneven foundation is the number one reason for installation failure. We recommend to apply primer to concrete or self-leveling compound for a better adhesion.
Be very careful handling the solid marble medallion.
Solid marble is very fragile and heavy. It may crack if carried horizontally under its weight. Move it only vertically to the place of installation. Slowly tilt horizontally with the support of a piece of plywood underneath if it’s out of the box. Slide the medallion to the designated installation spot off the plywood piece.
Larger solid marble inlays consist of several segments of marble. Dry lay the pieces first to ensure tight fit and level. After installing with mortar – fill the gaps with epoxy. See the “Stone repair” paragraph for color-matching recommendations. Solid stone inlay made in several pieces must be polished after installation. We recommend Pantera Grinding and Polishing machine for the best results.
Please note that the solid marble floors should be installed within a few weeks of delivery. Even in perfect storage conditions, the porous marble can absorb moisture from the air and change geometry.
The marble is typically shipped in wooden crates in a vertical position. The Crates are built to minimize the stress and breakage in transit – not long-term storage. When marble is stored vertically for an extended time, the marble pieces may develop a bow.
The bent pieces may require additional grinding and polishing on-site. In some extreme cases, the bent portion needs to be broken off, installed leveled, and have the gap filled with color-matched epoxy.
Layout:
Square off the area where the medallion is to be installed. Measure and mark centers of the area both ways. Use a chalk-line or marker to install intersecting lines through the center of the area. This will divide the area into four parts.
Dry lay the medallion and surrounding tiles. Mark the tiles around the medallion with numbers. Mark the curve cut line on tiles. Using a grinder, cut the tiles to the shape. Dry fit the cut tiles in the same numbered positions and make adjustments for proper fit.


Preparing the Medallion:
Remove any remaining packing material from the medallion. If your medallion is in more than one piece, assemble it in an out-of-the-way area to familiarize yourself with the way it will fit together. Remove the protective rubber edge of the medallion.
Medallions up to 72" can be made in a single piece. Larger medallions are shipped in several pieces for easier handling and installation. The pieces are numbered or lettered on the back for easy assembly.
Adhesive & Trowels:
We recommend using Thinset Adhesive for the Floor Medallions. LATAPOXY 300 by Laticrete is recommended for aluminum-backed medallions. For better adhesion, the aluminum backer is scored at the factory. Right before installation, we recommend rough sand/score the aluminum back again to remove oxidation.
For outdoor we recommend using 254 Laticrete Platinum mortar . For indoor solid marble floors, use 253 Gold Laticrete mortar .
We recommend using a 1/4 inch square notched trowel for the floor medallions and a 1/8 inch V notched trowel for the backsplash medallions.
When installing solid marble - use a 1/2 inch trowel for the subfloor mortar application and a 1/4 inch square trowel for the inlays and tiles.
Spreading Thinset or Adhesive:
Using the intersecting lines as a guide, apply the thin-set or adhesive. Spread one coat using the trowel's flat side and then immediately come back with a second coat, using the notched side of the trowel.
Laying the Medallion:
Place the medallion in the thin-set and press it into place lining using the intersection lines as guides.
Use a woodblock or grout float to press the medallion firmly into place, taking care to adjust and level to get a smooth finish. Also, any part of the medallion that is low in the floor or wall may be raised by inserting a extra thin-set or adhesive under the medallion.
Note that larger medallions sometimes may slightly warp or bow during transportation. The solution is to lay the medallion flat in place and weigh it with a sandbag or similar overnight. Make sure that weight is sufficient to flatten the medallion. The adhesive should keep the medallion flat once cured. Verify flatness after installation.


Apply thin-set to the cut tiles and insert them taking care to adjust for level and smoothness.
Use a damp sponge to clean any adhesive residue from the medallion and the joints.
Sealing and Maintenance:
Stone Floor Medallions should be sealed after installation with a specialized penetrating stone sealer. This is true for any stone installation.
After installation, clean marble surfaces with non Acidic, low-pH specialized stone cleaners such as Mira Clean #1 by Miracle Sealants. Do not scrub it with a brush or any other scrubbing tool. Vacuum often to remove any grit. Outdoor medallion can be power-washed.
After the medallion is cleaned, initially apply 3-4 coats of sealer within an hour of each application.
Sealer should be periodically reapplied at least once every two years with one coat. The outdoor medallions should be resealed annually. An excellent sealer to consider is "Miracle 511 Impregnation Sealer" sold in Home Depot and Amazon.
How to fix chipped and scratched marble inlay:
Marble inlay can develop chips and cracks during rough handling and installation. Those issues can be repaired on-site after installation. The repairs, if done correctly, are practically invisible.
For Emperador Dark and Emperador Light damages, if a piece comes off, put the original piece back, crash a stone of the same color (if you don't have Emperador dark or light, get some broken tiles or chair rails for this purpose). Look around the crack and see what the natural size of the color pieces around the crack is. Choose similar sizes to fill into the crack (make sure to use mixed sizes and use some very fine pieces or even powder to fill very small gaps too). Before putting the stone pieces into the crack, mixed the pieces with a very small amount of epoxy (just enough to wet all the pieces.) After the stone pieces are dry in the crack, polish the area with a small hand-held polishing tool. A good repair should be almost invisible.
For Crema Marfil, crash a small piece of Crema Marfil into the size of 1/4 - 1/2 of rice (use some very fine pieces and powder too). Mix the pieces with a very small amount of epoxy, fill in the crack, and polish. Again the repair should be almost invisible. A common mistake is to crash the Crema Marfil into powder and fill the gap with powder. After repair, the crack will still be visible (somehow, the powder will lose some color and become too light). ). It would help if you used some mixed-size pieces (size similar to broken rice).
If it is “hairline" cracks, fill it with clear epoxy (use a razor blade to go back and forth around the cracks to work the epoxy into cracks), clean the area with a razor blade as soon as the epoxy started to dry (about 30 min, when the epoxy is no longer liquid, feels like rubber, but not totally dry yet - this is the time that is very easy to clean with a blade.) No polishing is necessary. When the clear epoxy dries, it will look like natural crystallines that exist in Crema Marfil.
Some people do mix the yellow color into the epoxy to get a better result. But matching the color of Crema Marfil will require some experimenting. Other installers mix honey color epoxy with white and a bit of grey pigments for beige colors. Do not put in a hardener (usually the less clear part in the 2 part epoxy) until you are satisfied with the color.
You can use 2 part epoxy in plastic syringes sold in Hardware stores. Use the one that dries in at least 30-45 minutes. (The one that dries in 5 minutes is not strong enough.)Surface treatment options:
You can request different types of treatment for stone waterjet inlays when placing an order. Standard marble medallions are factory polished. One way to address slippage is to seal the marble with Anti-Slip penetrating sealers - for example, Miracle ANTISLIP6 511 sealant. Alternatively, you may order your medallion "Honed" for a non-polished surface. Please note that marble colors may be "duller" when unpolished.
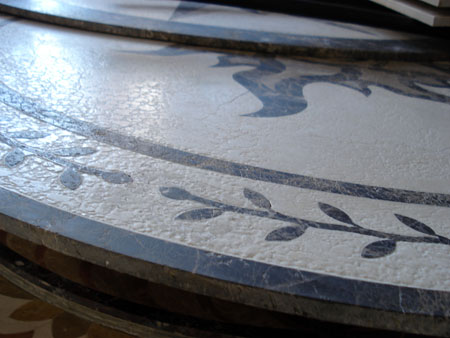
Stone Medallions can also be treated at the factory to have a "tumbled" appearance, as shown in the photo below.

I need to install my floor and can’t wait for the medallion:
You may install the tiles, prepare the site, and install the medallion later quickly. This way, you don’t have a hole in the floor and have part of the setup done beforehand.
- Mark the center and medallion size on the subfloor.
- Lay down all the tiles with proper grout spacing, centering the tiles on the marked center of the medallion. Make sure to have equal pieces of tiles around the medallion shape.
- You now have an area slightly larger than a future medallion. In this space, use only a touch of thin set to hold tiles in place.
- Don’t grout inside the medallion area.
- When the medallion arrives, lay it on the tiles and mark the contour. Mark the surrounding pieces with numbers to record their position.
- Pop the tiles and cut them to shape with a grinder, following the trace lines.
- Install the medallion and surrounding tile pieces with thin-set and grout around them as described in general installation instructions.
Can I install a marble medallion into the hardwood floor?
Absolutely!
- Unless you order a custom ¾” medallion, you may need to shim the standard (3/8”) medallion with the plywood to level. Cut round plywood piece, same size as the medallion.
- Cut the hole in the floor with the router and any circle-cut jig. Ensure the hole is slightly (~1/8” - 1/4") larger than the medallion diameter. It is essential to leave a slight gap between wood and stone.
- The medallion and plywood shim can be glued using Bostik Best adhesive.
- Fill the gap with color grout-caulk, matching the surrounding wood.


